Guide to Adobe Photoshop – Image sharpening without additional noise
I see way too often photos that have been over sharpened, or where the images have been killed with excessive use of noise removal. Maybe because the sharpening would have added too much extra noise to them? Here’s a guide that helps you to sharpen your images without additional noise + It gives you much more freedom than the regular Photoshop sharpening tools. This guide works on every Photoshop CS version (might work on earlier versions too):
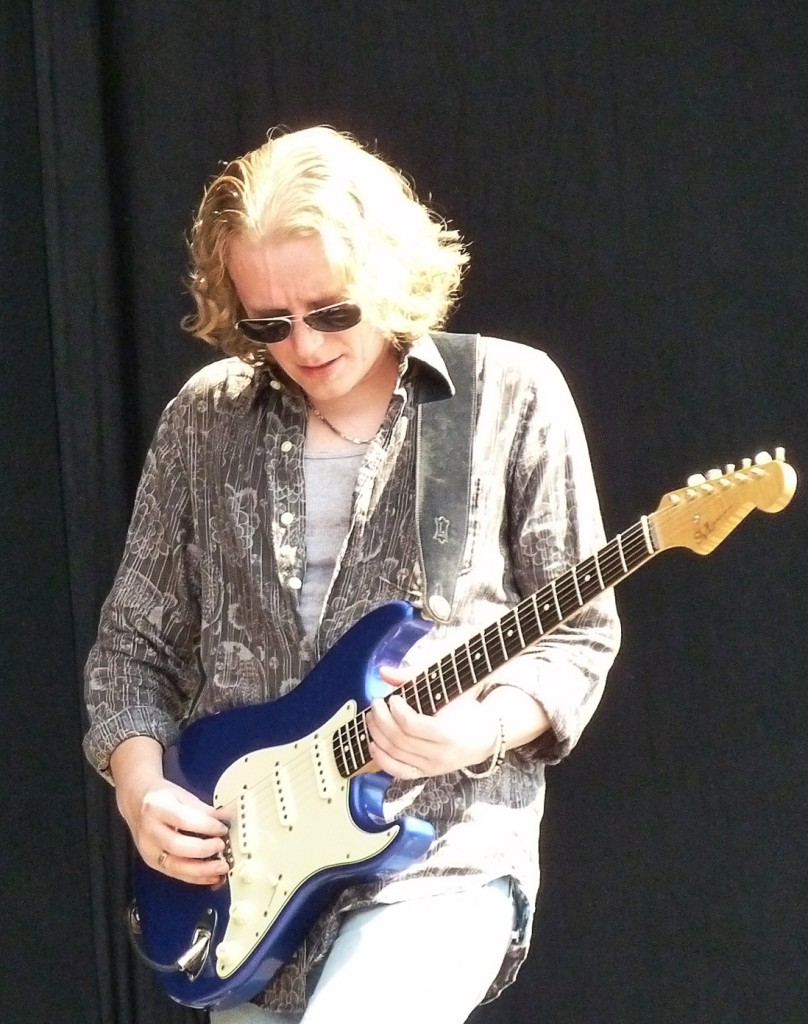
Original picture: (Matt Schofield – Puistoblues 2011):
As you can see this pictures has a nice amount of noise, and it would be hard to add extra sharpening without adding too much extra noise. Photo is not technically not best, but it’s a good example for this tutorial.
Lets start with the guide, shall we?
1. Open the image, then duplicate the layer (right mouse click and select -> “Duplicate Layer”)
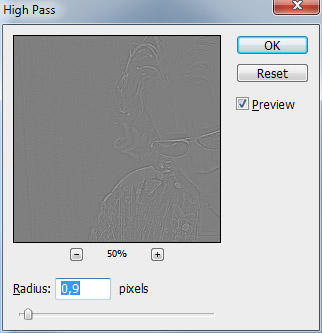
2. Make sure you have the new layer duplicated layer selected, and go to Filter -> Other -> High Pass.
3. Image should now turn grey. Select the radius, and move the slider until you see outlines coming out. 0,9 pixels is usually a good starting point (fits for most of the images). When you have found the right settings, click OK.
4. Next we need to take the saturation out from the “high pass image”. Select Hue/Saturation (Ctrl+U), and move the saturation slider to the value -100. This step will remove any extra color noise from the sharpening progress.
5. Remove extra noise/grain from the “high pass image” with the Photoshop’s noise removal filter. or you can use your favorite noise removal plugin like Noise Ninja, Neat Image etc… Just make sure that the lines doesn’t get too blurry.
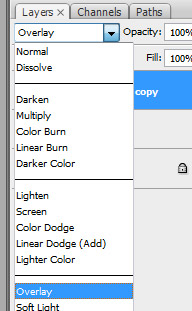
6. Once the noise/grain has been removed set the layer type from normal to overlay (or try soft light/hard light).
7. If the image is not sharp enough, you can duplicate the “high pass layer”, many times as you want! That’s it!
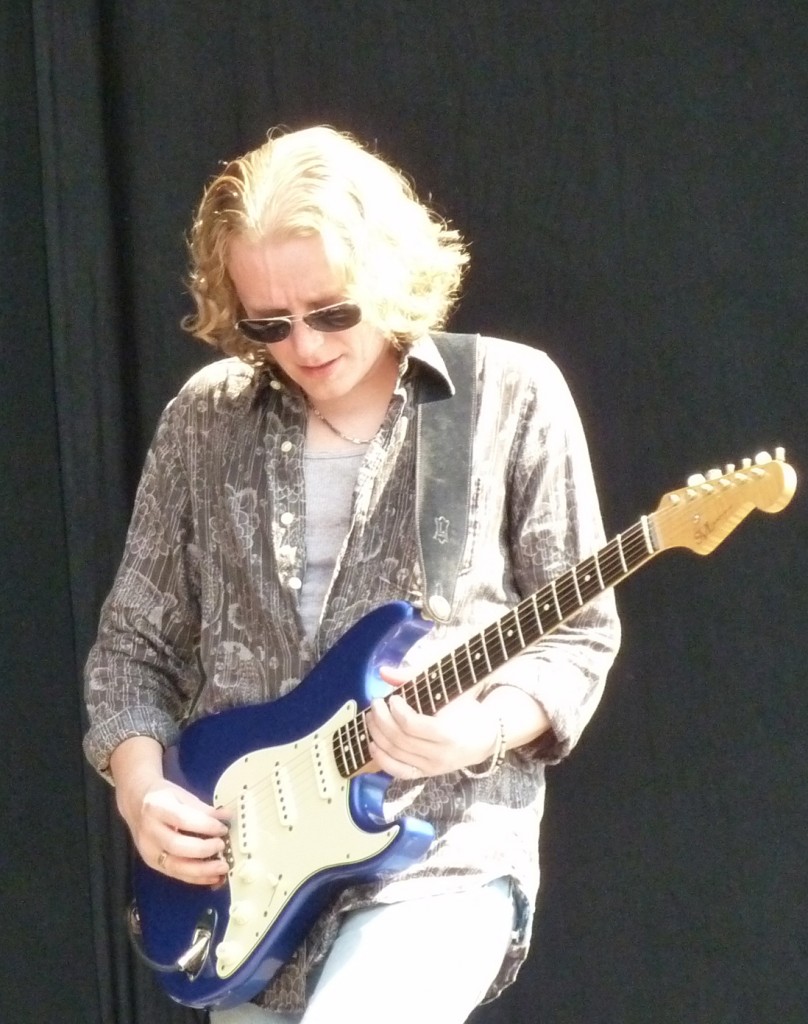
 Final image with corrected levels. As you can see the original noise is still there (it wasn’t removed in the first place), and yet the image is much more sharpen without any additional noise!
With this method you can make your images much more sharpen, than what you can do with Photoshop’s own sharpening tools (that usually bring white halo around your images easily), and also sharpens the noise. I’m using this sharpening technique with pretty much every photo (that needs extra sharpening that is…)
You could also turn this into a macro that fits best for your needs, but this isn’t too time consuming in the first place. You just need to tweak your images couple of times to get used to this method.
Happy sharpening. :)
Believe it or not, but this blog does not write it self. :)
Support this blog and buy your health products from iHerb.com, and get a 5 dollar discount (or $10! from orders over $40) from your first order by using coupon YUY952 – Try it, love it, share it.


